PLC Simulator
Symbol chart + cheat sheet

Ladder Logic Symbols and Meanings

Every ladder diagram symbol in one chart — contacts, coils, one-shots, timers, counters, comparison, math and program-flow — with Allen-Bradley mnemonics, IEC 61131-3 names and plain-English meanings. Then practise each one live in your browser, no install or PLC licence needed.

What are ladder logic symbols?

Ladder logic symbols are the graphical instructions of ladder diagram (LD) programming — contacts, coils and instruction blocks drawn between two vertical power rails. Each horizontal rung is one logic statement: input conditions on the left, the result on the right, evaluated as if electrical power flowed from the left rail to the right. The notation was designed to mirror relay wiring schematics, which is why electricians could read the first PLC programs without retraining — and why the same shapes still appear in every PLC platform today.

This page is the complete chart: every symbol, its Allen-Bradley mnemonic, its IEC 61131-3 name, what it means and how it is used — followed by a worked rung-reading example and a printable cheat sheet.

Ladder logic symbols overview — a normally-open contact (XIC), a normally-closed contact (XIO), an output coil (OTE), a latch coil (OTL) and an unlatch coil (OTU) drawn between the power railsThe core ladder logic symbols side by side: XIC examine-if-closed, XIO examine-if-open, OTE output energize, OTL output latch and OTU output unlatch.XICIfXIOIfOTEEnergizeLOTLLatchUOTUUnlatch
The five core symbols at a glance. The full chart with meanings follows below.

Contact symbols and meanings

Contacts are the input conditions on the left side of a rung. Wired in series they form an AND; stacked in parallel branches they form an OR. The two-bar shape is universal — only the names change between dialects.

SymbolName (AB / IEC)What it meansUsage example
Normally-open contact (XIC, Examine If Closed) symbol: two parallel vertical lines on the rung; passes power while its input bit is ON.
Normally-open contact
XIC — Examine If Closed
IEC: NO contact -| |-
full XIC reference →
Passes power when its bit is TRUE (1). The default input element: the rung sees "closed" whenever the addressed input, sensor or internal bit is ON.A Start pushbutton is programmed as an XIC so pressing it completes the rung.
Normally-closed contact (XIO, Examine If Open) symbol: two vertical lines with a diagonal slash; passes power until its input turns ON.
Normally-closed contact
XIO — Examine If Open
IEC: NC contact -|/|-
full XIO reference →
Passes power when its bit is FALSE (0) — the diagonal slash inverts the logic. The rung breaks the moment the addressed bit turns ON.A Stop button is programmed as an XIO so pressing it breaks the rung and drops the motor.

Coil (output) symbols and meanings

Coils sit at the right end of a rung and write the result of the logic — a real output like a motor contactor, or an internal memory bit that other rungs read back as a contact.

SymbolName (AB / IEC)What it meansUsage example
Output Energise coil (OTE) symbol: a pair of parentheses at the right of the rung; turns its bit ON while the rung is true and OFF when it goes false.
Output coil
OTE — Output Energise
IEC: Coil -( )-
full OTE reference →
Follows the rung exactly: ON while a complete path of power reaches it, OFF the scan the rung goes false. The standard, non-retentive output.The Motor coil in a start/stop rung is an OTE — it drops out the instant Stop is pressed.
Output Latch coil (OTL) symbol: a coil enclosing the letter L; sets its bit ON and holds it ON even after the rung goes false, until an unlatch resets it.L
Latch coil
OTL — Output Latch
IEC: Set coil -(S)-
full OTL/OTU reference →
Sets its bit TRUE and holds it TRUE even after the rung goes false. The bit stays latched until an unlatch instruction on the same address clears it.An alarm horn is latched with OTL so a momentary fault keeps the horn sounding until acknowledged.
Output Unlatch coil (OTU) symbol: a coil enclosing the letter U; resets a latched bit back to OFF when the rung goes true.U
Unlatch coil
OTU — Output Unlatch
IEC: Reset coil -(R)-
full OTL/OTU reference →
Resets a latched bit back to FALSE when its rung goes true. Always programmed as the partner of an OTL on the same address.The Acknowledge button drives an OTU that unlatches the alarm-horn bit set by the OTL.

Edge-detection (one-shot) symbols and meanings

Edge symbols fire for exactly one program scan when a signal transitions, instead of staying true for as long as a bit is held. Use them whenever an action must happen once per event — not once per scan.

SymbolName (AB / IEC)What it meansUsage example
One-shot (ONS) symbol: a contact enclosing the letters ONS; passes power for exactly one program scan on a false-to-true transition of the conditions before it.ONS
One-shot
ONS — One Shot
IEC: R_TRIG (rising edge)
full ONS reference →
Passes power for a single scan on a false-to-true transition of the conditions before it, then blocks until the input goes low and high again.An ONS after a photo-eye contact increments a parts counter once per box, not once per scan.
One-Shot Rising (OSR) symbol: an instruction block labelled OSR with a rising-step waveform; sets its output for one scan when its input goes from OFF to ON.OSR
One-shot rising
OSR — One Shot Rising
IEC: R_TRIG
Output-style one-shot: sets its output bit for one scan when the rung input goes from OFF to ON. Same behaviour as ONS, packaged as an instruction block.An OSR captures the exact scan an operator presses Cycle Start to stamp a timestamp register.
One-Shot Falling (OSF) symbol: an instruction block labelled OSF with a falling-step waveform; sets its output for one scan when its input goes from ON to OFF.OSF
One-shot falling
OSF — One Shot Falling
IEC: F_TRIG
The falling-edge twin: sets its output bit for one scan when the rung input goes from ON to OFF.An OSF fires when a conveyor sensor clears, triggering the "part exited" logic exactly once.

Timer symbols and meanings

Timer blocks measure elapsed time against a preset and expose status bits (EN enabled, TT timing, DN done) that other rungs read as contacts. Allen-Bradley names them TON / TOF / RTO; IEC 61131-3 uses TON / TOF / TONR.

SymbolName (AB / IEC)What it meansUsage example
On-delay timer (TON) symbol: an instruction block labelled TON with EN and DN status bits; starts timing when the rung goes true and sets DN after the preset elapses.TONEN · DN
On-delay timer
TON — Timer On-Delay
IEC: TON
full timer guide →
Starts timing when the rung goes TRUE and sets its DN bit once the preset elapses; resets to zero the moment the rung goes false.A TON delays a second conveyor starting for 5 s after the first, to stagger inrush current.
Off-delay timer (TOF) symbol: an instruction block labelled TOF with EN and DN status bits; keeps DN true for the preset time after the rung goes false.TOFEN · DN
Off-delay timer
TOF — Timer Off-Delay
IEC: TOF
TON vs TOF compared →
DN is TRUE while the rung is energised, and stays TRUE for the preset time after the rung goes false — a hold-on delay.A TOF keeps a cooling fan running for 30 s after the heater it serves switches off.
Retentive timer (RTO) symbol: an instruction block labelled RTO; accumulates time across multiple true periods and keeps its value when the rung goes false, until reset.RTOEN · DN
Retentive timer
RTO — Retentive Timer On
IEC: TONR
full timer guide →
Accumulates run-time across multiple TRUE periods and keeps its accumulator when the rung goes false. Only a RES (reset) instruction clears it.An RTO totals motor run-hours across shifts to trigger maintenance at 500 h.

Counter symbols and meanings

Counter blocks tally false-to-true transitions of their rung against a preset. Like timers, they expose status bits (CU/CD counting, DN done) that gate other rungs.

SymbolName (AB / IEC)What it meansUsage example
Count-up counter (CTU) symbol: an instruction block labelled CTU; increments its accumulator on each false-to-true rung transition and sets DN at the preset.CTUCU · DN
Count-up counter
CTU — Count Up
IEC: CTU
full CTU reference →
Increments its accumulator by one on each false-to-true rung transition and sets DN when the count reaches the preset.A CTU counts boxes past a photo-eye and sets DN at 24 to signal a full pallet layer.
Count-down counter (CTD) symbol: an instruction block labelled CTD; decrements its accumulator on each false-to-true rung transition.CTDCD · DN
Count-down counter
CTD — Count Down
IEC: CTD
full CTD reference →
Decrements the accumulator on each false-to-true transition. Often shares an address with a CTU so one counter tracks items in minus items out.A CTD decrements the buffer count each time the downstream machine takes a part.
Up-down counter (CTUD) symbol: an IEC instruction block labelled CTUD with separate count-up and count-down inputs driving one accumulator.CTUDCU · CD · DN
Up-down counter
CTU + CTD pair
IEC: CTUD
full CTUD reference →
The IEC combined counter: separate count-up and count-down inputs drive a single accumulator — one block instead of a paired CTU/CTD.A CTUD tracks live occupancy of a car park: entry gate counts up, exit gate counts down.

Comparison & math symbols and meanings

Past on/off logic, instruction blocks work on numbers. Comparison blocks sit in the power path and gate the rung like a contact; math and move blocks act at the end of the rung like a coil. When the two sides of a compare are different data types, convert first — see the DINT-to-REAL conversion reference.

SymbolName (AB / IEC)What it meansUsage example
Equal comparison (EQU) symbol: an instruction block labelled EQU comparing Source A = Source B; passes power when the two values are equal.EQUA = B
Equal comparison
EQU — Equal
IEC: EQ ( = )
True while Source A equals Source B, passing power to the rest of the rung. Siblings NEQ, LEQ and GEQ share the same block shape.EQU checks the recipe number equals 3 before enabling the "Recipe 3" fill sequence.
Greater-than comparison (GRT) symbol: an instruction block labelled GRT; passes power when Source A is greater than Source B.GRTA > B
Greater-than comparison
GRT — Greater Than
IEC: GT ( > )
True while Source A is greater than Source B — the go-to block for high-level and over-range checks.GRT compares tank level against 90% to energise the high-level warning beacon.
Less-than comparison (LES) symbol: an instruction block labelled LES; passes power when Source A is less than Source B.LESA < B
Less-than comparison
LES — Less Than
IEC: LT ( < )
True while Source A is less than Source B — the mirror of GRT for low-level and under-range checks.LES watches line speed below a minimum to flag a slipping drive belt.
Move (MOV) symbol: an instruction block labelled MOV; copies a source value into a destination tag each scan the rung is true.MOVSrc → Dest
Move
MOV — Move
IEC: MOVE
full MOV reference →
Copies a source value into a destination tag every scan the rung is true — the workhorse for loading presets, clearing registers and shuffling data.MOV loads 4000 into a timer preset when the operator selects the "long cycle" mode.
Add math (ADD) symbol: an instruction block labelled ADD; stores Source A plus Source B in a destination tag when the rung is true. SUB, MUL and DIV share the same shape.ADDA + B → Dest
Add (math block)
ADD — Add
IEC: ADD
Stores Source A + Source B in a destination when the rung is true. SUB, MUL and DIV share the shape — swap the label, keep the wiring.ADD totals the counts from two infeed lanes into a single production register.

Program-flow symbols and meanings

Program-flow symbols change which rungs execute: jumping to subroutines, marking jump targets, and fencing whole zones of logic so they can be disabled as a block.

SymbolName (AB / IEC)What it meansUsage example
Jump to Subroutine (JSR) symbol: an instruction block labelled JSR; when the rung is true, execution jumps to the named subroutine, then returns.JSR→ routine
Jump to subroutine
JSR — Jump to Subroutine
IEC: CAL (call)
full JSR reference →
When the rung is true, scanning jumps to the named routine, executes it, and returns to the rung after the JSR. The backbone of organised, modular programs.The main routine calls JSR "ConveyorControl" every scan so conveyor logic lives in its own file.
Label (LBL) symbol: a rounded label marker at the start of a rung; the landing target for a JMP jump instruction.LBL
Label
LBL — Label
IEC: Jump label
Marks the landing point for a JMP (jump) instruction. Scanning resumes at the LBL rung, skipping everything between the JMP and the label.A JMP over non-critical display logic lands on LBL 20 to shorten the scan during a fault.
Return (RET) symbol: an instruction block labelled RET at the end of a subroutine; hands execution back to the rung after the JSR that called it.RET← return
Return
RET — Return
IEC: RET
Ends a subroutine and hands execution back to the rung after the JSR that called it. Optional in many platforms — the end of the routine returns implicitly.A conditional RET exits the fault-handler routine early once the fault is cleared.
Master Control Reset (MCR) symbol: a coil enclosing the letters MCR, used in pairs to fence a zone of rungs; when the zone is disabled its non-retentive outputs de-energise.MCR
Master control reset (zone markers)
MCR — Master Control Reset
IEC: MCS / MCR zone
full MCR reference →
Used in pairs to fence a zone of rungs. When the first MCR rung is false, every non-retentive output inside the zone de-energises; latched bits keep their state.An MCR zone wraps all auto-mode rungs so switching to manual disables them in one move.

Structure symbols: rails, rungs and branches

The scaffolding every other symbol hangs on. Ladder diagrams inherit their look from relay wiring schematics — two vertical power rails with numbered horizontal rungs strung between them.

SymbolName (AB / IEC)What it meansUsage example
Power rails symbol: two vertical rails at the far left and right of a ladder diagram, with each horizontal rung drawn between them; logical power flows from the left rail to the right rail.rungs
Power rails
Left / right rail
IEC: Power rails (L / N heritage)
The two vertical lines framing the diagram. Logical "power" flows from the left rail through each rung's conditions toward the right rail. Rungs evaluate top to bottom, left to right, every scan.Every rung you write is implicitly connected to both rails — the editor draws them for you.
Branch (parallel path) symbol: the rung wire splits at a junction into two parallel paths that rejoin further right; power passes if either path is true, forming an OR condition.OR
Branch (parallel path)
Branch
IEC: Parallel connection (OR)
The rung wire splits at a junction into parallel paths that rejoin further right. Power passes if ANY path is true — the graphical OR, and the shape behind every seal-in circuit.A seal-in contact sits on a branch in parallel with the Start button, holding the rung after release.

Allen-Bradley vs IEC 61131-3 symbol names

The drawn shapes are nearly universal — the names differ by dialect. Allen-Bradley uses three-letter mnemonics (XIC, XIO, OTE); IEC 61131-3 and Siemens lean on the drawn symbol itself. The key mappings: XIC = -[ ]- = normally-open, and XIO = -[/]- = normally-closed — no matter what the toolbar calls them. When you hit an unfamiliar name, map it back to the drawn symbol: identify the shape (contact, coil or block), check for the slash, read the tag, then trace power flow left to right. The drawn symbol never lies; only the label changes between platforms.

How to read a rung: the motor seal-in, symbol by symbol

Put the symbols together and you can read any rung. Here is the classic motor start/stop with a seal-in — the numbered callouts walk left to right along the power path.

Annotated motor seal-in rung: a normally-open Start contact (1) with a parallel Motor seal-in contact below it (2), in series with a normally-closed Stop contact (3), energising the Motor output coil (4). Power flows from the left rail to the right rail.StartMotorStopMotor1234power flows left → right — the coil energises only on a complete path
The motor seal-in rung with numbered callouts — the shape behind almost every start/stop circuit in industry.
  1. 1Start — normally-open contact (XIC). Closed only while the Start button is pressed. On its own it would drop the motor the moment the operator lets go.
  2. 2Motor — seal-in contact on a branch. A normally-open contact addressed to the Motor output itself, in parallel with Start (an OR). Once the motor is running, this contact is closed — so power keeps flowing after Start is released. This is the seal-in.
  3. 3Stop — normally-closed contact (XIO). Passes power until the Stop button is pressed. Pressing Stop breaks the only path to the coil, the coil de-energises, the seal-in contact opens, and the rung stays off — a safe, self-resetting stop.
  4. 4Motor — output coil (OTE). Energises while a complete path of power reaches it, and drives both the real motor contactor and the seal-in contact in branch 2.

Two rules cover everything you just read: contacts in series are AND, branches in parallel are OR. Every rung in every ladder program — however long — reduces to those two rules plus the symbols in the chart above.

Ladder logic symbols cheat sheet (printable)

All 25 symbols on one page — Allen-Bradley mnemonic, IEC name and meaning. Press Ctrl/Cmd + P and choose Save as PDF to keep an offline copy.

SymbolAllen-BradleyIEC 61131-3Meaning
Normally-open contact (XIC, Examine If Closed) symbol: two parallel vertical lines on the rung; passes power while its input bit is ON.XIC — Examine If ClosedNO contact -| |-Passes power when its bit is TRUE (1). The default input element: the rung sees "closed" whenever the addressed input, sensor or internal bit is ON.
Normally-closed contact (XIO, Examine If Open) symbol: two vertical lines with a diagonal slash; passes power until its input turns ON.XIO — Examine If OpenNC contact -|/|-Passes power when its bit is FALSE (0) — the diagonal slash inverts the logic. The rung breaks the moment the addressed bit turns ON.
Output Energise coil (OTE) symbol: a pair of parentheses at the right of the rung; turns its bit ON while the rung is true and OFF when it goes false.OTE — Output EnergiseCoil -( )-Follows the rung exactly: ON while a complete path of power reaches it, OFF the scan the rung goes false. The standard, non-retentive output.
Output Latch coil (OTL) symbol: a coil enclosing the letter L; sets its bit ON and holds it ON even after the rung goes false, until an unlatch resets it.LOTL — Output LatchSet coil -(S)-Sets its bit TRUE and holds it TRUE even after the rung goes false. The bit stays latched until an unlatch instruction on the same address clears it.
Output Unlatch coil (OTU) symbol: a coil enclosing the letter U; resets a latched bit back to OFF when the rung goes true.UOTU — Output UnlatchReset coil -(R)-Resets a latched bit back to FALSE when its rung goes true. Always programmed as the partner of an OTL on the same address.
One-shot (ONS) symbol: a contact enclosing the letters ONS; passes power for exactly one program scan on a false-to-true transition of the conditions before it.ONSONS — One ShotR_TRIG (rising edge)Passes power for a single scan on a false-to-true transition of the conditions before it, then blocks until the input goes low and high again.
One-Shot Rising (OSR) symbol: an instruction block labelled OSR with a rising-step waveform; sets its output for one scan when its input goes from OFF to ON.OSROSR — One Shot RisingR_TRIGOutput-style one-shot: sets its output bit for one scan when the rung input goes from OFF to ON. Same behaviour as ONS, packaged as an instruction block.
One-Shot Falling (OSF) symbol: an instruction block labelled OSF with a falling-step waveform; sets its output for one scan when its input goes from ON to OFF.OSFOSF — One Shot FallingF_TRIGThe falling-edge twin: sets its output bit for one scan when the rung input goes from ON to OFF.
On-delay timer (TON) symbol: an instruction block labelled TON with EN and DN status bits; starts timing when the rung goes true and sets DN after the preset elapses.TONEN · DNTON — Timer On-DelayTONStarts timing when the rung goes TRUE and sets its DN bit once the preset elapses; resets to zero the moment the rung goes false.
Off-delay timer (TOF) symbol: an instruction block labelled TOF with EN and DN status bits; keeps DN true for the preset time after the rung goes false.TOFEN · DNTOF — Timer Off-DelayTOFDN is TRUE while the rung is energised, and stays TRUE for the preset time after the rung goes false — a hold-on delay.
Retentive timer (RTO) symbol: an instruction block labelled RTO; accumulates time across multiple true periods and keeps its value when the rung goes false, until reset.RTOEN · DNRTO — Retentive Timer OnTONRAccumulates run-time across multiple TRUE periods and keeps its accumulator when the rung goes false. Only a RES (reset) instruction clears it.
Count-up counter (CTU) symbol: an instruction block labelled CTU; increments its accumulator on each false-to-true rung transition and sets DN at the preset.CTUCU · DNCTU — Count UpCTUIncrements its accumulator by one on each false-to-true rung transition and sets DN when the count reaches the preset.
Count-down counter (CTD) symbol: an instruction block labelled CTD; decrements its accumulator on each false-to-true rung transition.CTDCD · DNCTD — Count DownCTDDecrements the accumulator on each false-to-true transition. Often shares an address with a CTU so one counter tracks items in minus items out.
Up-down counter (CTUD) symbol: an IEC instruction block labelled CTUD with separate count-up and count-down inputs driving one accumulator.CTUDCU · CD · DNCTU + CTD pairCTUDThe IEC combined counter: separate count-up and count-down inputs drive a single accumulator — one block instead of a paired CTU/CTD.
Equal comparison (EQU) symbol: an instruction block labelled EQU comparing Source A = Source B; passes power when the two values are equal.EQUA = BEQU — EqualEQ ( = )True while Source A equals Source B, passing power to the rest of the rung. Siblings NEQ, LEQ and GEQ share the same block shape.
Greater-than comparison (GRT) symbol: an instruction block labelled GRT; passes power when Source A is greater than Source B.GRTA > BGRT — Greater ThanGT ( > )True while Source A is greater than Source B — the go-to block for high-level and over-range checks.
Less-than comparison (LES) symbol: an instruction block labelled LES; passes power when Source A is less than Source B.LESA < BLES — Less ThanLT ( < )True while Source A is less than Source B — the mirror of GRT for low-level and under-range checks.
Move (MOV) symbol: an instruction block labelled MOV; copies a source value into a destination tag each scan the rung is true.MOVSrc → DestMOV — MoveMOVECopies a source value into a destination tag every scan the rung is true — the workhorse for loading presets, clearing registers and shuffling data.
Add math (ADD) symbol: an instruction block labelled ADD; stores Source A plus Source B in a destination tag when the rung is true. SUB, MUL and DIV share the same shape.ADDA + B → DestADD — AddADDStores Source A + Source B in a destination when the rung is true. SUB, MUL and DIV share the shape — swap the label, keep the wiring.
Jump to Subroutine (JSR) symbol: an instruction block labelled JSR; when the rung is true, execution jumps to the named subroutine, then returns.JSR→ routineJSR — Jump to SubroutineCAL (call)When the rung is true, scanning jumps to the named routine, executes it, and returns to the rung after the JSR. The backbone of organised, modular programs.
Label (LBL) symbol: a rounded label marker at the start of a rung; the landing target for a JMP jump instruction.LBLLBL — LabelJump labelMarks the landing point for a JMP (jump) instruction. Scanning resumes at the LBL rung, skipping everything between the JMP and the label.
Return (RET) symbol: an instruction block labelled RET at the end of a subroutine; hands execution back to the rung after the JSR that called it.RET← returnRET — ReturnRETEnds a subroutine and hands execution back to the rung after the JSR that called it. Optional in many platforms — the end of the routine returns implicitly.
Master Control Reset (MCR) symbol: a coil enclosing the letters MCR, used in pairs to fence a zone of rungs; when the zone is disabled its non-retentive outputs de-energise.MCRMCR — Master Control ResetMCS / MCR zoneUsed in pairs to fence a zone of rungs. When the first MCR rung is false, every non-retentive output inside the zone de-energises; latched bits keep their state.
Power rails symbol: two vertical rails at the far left and right of a ladder diagram, with each horizontal rung drawn between them; logical power flows from the left rail to the right rail.rungsLeft / right railPower rails (L / N heritage)The two vertical lines framing the diagram. Logical "power" flows from the left rail through each rung's conditions toward the right rail. Rungs evaluate top to bottom, left to right, every scan.
Branch (parallel path) symbol: the rung wire splits at a junction into two parallel paths that rejoin further right; power passes if either path is true, forming an OR condition.ORBranchParallel connection (OR)The rung wire splits at a junction into parallel paths that rejoin further right. Power passes if ANY path is true — the graphical OR, and the shape behind every seal-in circuit.

A cheat sheet gets you reading — the simulator gets you writing. Create a free account and every symbol on this sheet becomes a live, draggable instruction in the browser: watch contacts open, coils latch and timers count in real time, with auto-graded scenarios to drill each one.

Start free

Don't just memorise symbols — run them

See every contact and coil switch state live as the program scans
No licence cost — Studio 5000 and TIA Portal require paid subscriptions
Runs in the browser on Mac, Linux, Chromebook and iPad — no install
Auto-graded scenarios drill the symbols in real motor, timer and counter logic
Switch between Allen-Bradley-style, Siemens-style and IEC dialects
Print the cheat sheet, then build the rung beside it
Questions

Ladder logic symbols FAQ

Ladder logic symbols are the graphical instructions of a ladder diagram. The two vertical power rails frame the program; each horizontal rung is one logic statement read left to right. Contacts -| |- and -|/|- are input conditions, coils -( )- are outputs, and boxed instruction blocks add timers (TON, TOF, RTO), counters (CTU, CTD, CTUD), comparisons (EQU, GRT, LES), data moves (MOV) and program-flow control (JSR, MCR). Every symbol either passes power, blocks power, or writes a result when power reaches it.

Practise every ladder logic symbol in your browser

No install. No PLC licence. No credit card. Real contacts, coils, timers and counters with auto-graded feedback.
Start free

Technical reference and worked-example guide

Ladder logic symbols and meanings: implementation, evidence and troubleshooting

Direct answer

Ladder logic symbols and meanings becomes useful when it connects contacts, coils, branches, timers, counters, compare and arithmetic symbols grouped by purpose with each symbol to tag state, rung continuity, output ownership and physical feedback, then proves a start-stop, interlock and timed-output rung evaluated left to right under normal, boundary, fault and recovery conditions. The objective is a repeatable engineering or learning result, not merely activity inside a page or tool.

This guide is written for pLC beginners, maintenance technicians and students translating a ladder diagram into controller and machine behavior. The intended result is specific: the reader can identify a symbol, explain its evaluated condition, trace its tag or address and predict the resulting output state.

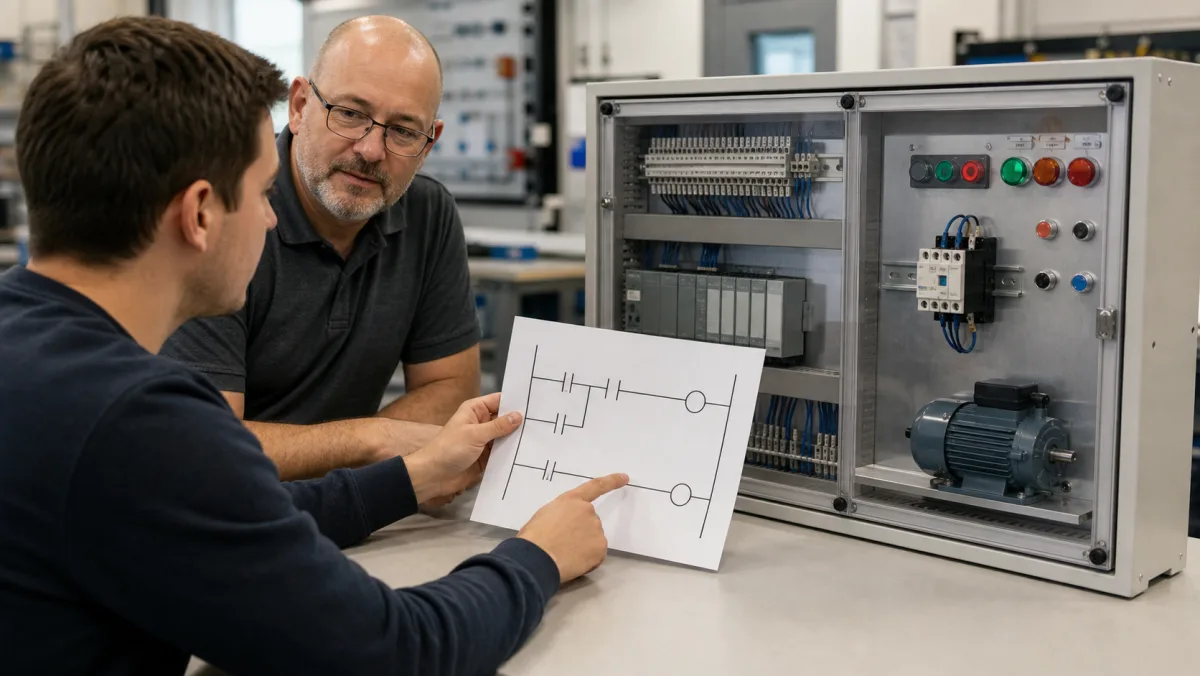
Automation instructor and learner compare a simple ladder diagram with a guarded PLC motor-control training bench.
A symbol is useful only when the learner can connect its evaluated logic state to the I/O, interface device and observable machine result.

System map / 02

Six concepts that control the result

Treat these as connected checkpoints. Each checkpoint has an expected state, an observable state and a boundary to the next part of the system. That structure prevents a software indication from being mistaken for physical proof.

NODE 01observable

Define the operating contract

contacts, coils, branches, timers, counters, compare and arithmetic symbols grouped by purpose. For ladder diagram symbols, record the initial condition, actor, requested change, observable result and stopping condition before selecting a tool or implementation.

NODE 02observable

Map the evidence path

each symbol to tag state, rung continuity, output ownership and physical feedback. Separate request, internal state, output or service, physical or user-visible result and independent feedback so each boundary can be inspected.

NODE 03observable

Prove normal operation

a start-stop, interlock and timed-output rung evaluated left to right. Run more than one cycle from a known state and retain the values, timings or artifacts that demonstrate repeatability.

NODE 04observable

Exercise a boundary case

normally closed interpretation, parallel branches, scan order, retentive state and simultaneous input changes. Choose minimum, maximum, simultaneous, delayed or restart conditions that reveal assumptions hidden by the happy path.

NODE 05observable

Diagnose a controlled fault

an inverted condition, duplicate coil, stale tag or missing feedback exposed by the symbol trace. Preserve the first symptom, divide the system at a measurable boundary and change one condition only after predicting the result.

NODE 06observable

Transfer and hand over

the interpreted rung checked in the selected vendor environment and against the controlled equipment. Restore normal state, remove temporary changes, repeat affected checks and document which claims remain limited to the learning environment.

Procedure / 03

A six-step practice and commissioning workflow

Run the steps in order the first time. Later, the same structure becomes a diagnostic loop: define the expected condition, observe the boundary, interpret the difference and choose one proving action.

  1. 01

    Write the acceptance case

    Convert contacts, coils, branches, timers, counters, compare and arithmetic symbols grouped by purpose into initial conditions, one stimulus and observable pass criteria.

    Evidence: Another person can repeat the case without guessing the intended result.

    Avoid: Using page completion or an animation as the acceptance criterion.

  2. 02

    Build the map

    Document each symbol to tag state, rung continuity, output ownership and physical feedback and name who owns each state or decision.

    Evidence: Every request and result has a source, destination and useful inspection point.

    Avoid: Using the same value as command, status and independent feedback.

  3. 03

    Run the baseline

    Apply a start-stop, interlock and timed-output rung evaluated left to right from a clean start and record the expected evidence.

    Evidence: Repeated runs produce the same bounded result.

    Avoid: Changing several parameters before a baseline exists.

  4. 04

    Challenge assumptions

    Test normally closed interpretation, parallel branches, scan order, retentive state and simultaneous input changes without changing the acceptance contract.

    Evidence: Limits, timing and restart behavior reach defined states.

    Avoid: Testing only one ideal sequence.

  5. 05

    Isolate one failure

    Introduce or analyse an inverted condition, duplicate coil, stale tag or missing feedback exposed by the symbol trace and locate the first disagreement.

    Evidence: The proving action distinguishes the leading hypotheses.

    Avoid: Resetting, forcing or replacing before evidence is retained.

  6. 06

    Close the evidence loop

    Complete the interpreted rung checked in the selected vendor environment and against the controlled equipment and repeat the affected regression cases.

    Evidence: Reference use is complete when inputs, assumptions, units or initial conditions are recorded and the result is independently checked at a useful boundary.

    Avoid: Treating an acknowledged message or one successful rerun as handover.

Diagnostic matrix / 04

Symptoms, proving points and next actions

The table is a reasoning aid, not a parts-replacement chart. Preserve the initial symptom, inspect the named boundary and use the interpretation to choose the next controlled test. Site safety procedures and equipment manuals remain authoritative.

Diagnostic symptoms, inspection points, interpretations and next actions for Ladder logic symbols and meanings: implementation, evidence and troubleshooting
Observed symptomInspectInterpretationNext proving action
The expected result is unclearRequirement, initial state, actor, stimulus, units and pass conditionThe technician, programmer and reviewer may be solving different versions of the task.Rewrite one observable acceptance case before continuing.
Internal state changes but the outcome does notRequest, final owner, output or service boundary and independent feedbackA software or interface indication proves intent at one layer, not the complete outcome.Trace the first boundary after the changing state.
Normal case passes but an edge case failsLimits, timing, simultaneous events, reset and restart assumptionsThe implementation contains a hidden assumption exposed by the changed condition.Add the failed boundary as a permanent regression case.
The failure disappears after resetOriginal symptom, histories, diagnostics, timestamps and active causeReset changed evidence or state without proving the initiating cause.Reproduce under a controlled condition and preserve pre/post-event data.
Simulator and target disagreeModel boundary, software version, task timing, I/O behavior, data types and configurationA learning model and the intended target do not share one of the recorded assumptions.Reduce the case and verify against current target documentation.
The result cannot be explainedPrediction, observation, proving action, alternative hypotheses and limitationsActivity occurred but the evidence is not yet transferable or reviewable.Have the learner defend the signal path and repeat a changed case.

Product evidence / 05

What the browser practice can actually demonstrate

The page connects definitions and worked examples to runnable tools, explicit assumptions and repeatable checks so a formula or pattern can be challenged.

Where simulation stops

Symbol shape alone does not establish exact vendor semantics, electrical state or safe machine behavior; verify instruction help, project data and field feedback.

Commissioning notebook / 06

Six cases that turn the concepts into evidence

Use these as written briefs rather than click-through instructions. For every case, state the expected condition before acting, retain the first useful observation and explain why the final result proves the requirement. A different program or component choice can still be correct when it produces the same bounded behavior and evidence.

Case 01

predict → observe → prove

Prove define the operating contract

Engineering context. contacts, coils, branches, timers, counters, compare and arithmetic symbols grouped by purpose. For ladder diagram symbols, record the initial condition, actor, requested change, observable result and stopping condition before selecting a tool or implementation. Begin with a written normal condition and identify which request, state, physical result or communication value will provide independent confirmation. Do not begin by changing the configuration; the initial state is part of the evidence and should remain reproducible.

Controlled setup. Use the “Write the acceptance case” stage of the workflow: convert contacts, coils, branches, timers, counters, compare and arithmetic symbols grouped by purpose into initial conditions, one stimulus and observable pass criteria. The acceptance record should show this result: another person can repeat the case without guessing the intended result. Record initial conditions, the exact stimulus and the observation point so another learner can repeat the case without relying on your memory.

Fault challenge. Introduce or analyse “The expected result is unclear” as one bounded deviation. Inspect requirement, initial state, actor, stimulus, units and pass condition The working interpretation is that the technician, programmer and reviewer may be solving different versions of the task. The next proving action is to rewrite one observable acceptance case before continuing. Change only one condition before observing the result, and preserve timestamps or measurements where timing matters.

Review and recovery. The most common trap here is using page completion or an animation as the acceptance criterion. After restoring the cause, repeat the normal case and at least one stop, timeout, disconnect or restart boundary relevant to this topic. Remove temporary forces and bypasses, return the model to a known state and retain the evidence that both operation and recovery are deliberate.

Explain it aloud: What should I learn first about ladder diagram symbols? A defensible short answer is: Start with the operating contract and evidence path: contacts, coils, branches, timers, counters, compare and arithmetic symbols grouped by purpose, followed by each symbol to tag state, rung continuity, output ownership and physical feedback. Add advanced features only after the baseline is predictable.

Case 02

predict → observe → prove

Prove map the evidence path

Engineering context. each symbol to tag state, rung continuity, output ownership and physical feedback. Separate request, internal state, output or service, physical or user-visible result and independent feedback so each boundary can be inspected. Begin with a written normal condition and identify which request, state, physical result or communication value will provide independent confirmation. Do not begin by changing the configuration; the initial state is part of the evidence and should remain reproducible.

Controlled setup. Use the “Build the map” stage of the workflow: document each symbol to tag state, rung continuity, output ownership and physical feedback and name who owns each state or decision. The acceptance record should show this result: every request and result has a source, destination and useful inspection point. Record initial conditions, the exact stimulus and the observation point so another learner can repeat the case without relying on your memory.

Fault challenge. Introduce or analyse “Internal state changes but the outcome does not” as one bounded deviation. Inspect request, final owner, output or service boundary and independent feedback The working interpretation is that a software or interface indication proves intent at one layer, not the complete outcome. The next proving action is to trace the first boundary after the changing state. Change only one condition before observing the result, and preserve timestamps or measurements where timing matters.

Review and recovery. The most common trap here is using the same value as command, status and independent feedback. After restoring the cause, repeat the normal case and at least one stop, timeout, disconnect or restart boundary relevant to this topic. Remove temporary forces and bypasses, return the model to a known state and retain the evidence that both operation and recovery are deliberate.

Explain it aloud: How do I practise ladder diagram symbols effectively? A defensible short answer is: Use short cases with known initial conditions, a written prediction, one action and an observable result. Then alter a boundary or fault and explain why the evidence changed.

Case 03

predict → observe → prove

Prove prove normal operation

Engineering context. a start-stop, interlock and timed-output rung evaluated left to right. Run more than one cycle from a known state and retain the values, timings or artifacts that demonstrate repeatability. Begin with a written normal condition and identify which request, state, physical result or communication value will provide independent confirmation. Do not begin by changing the configuration; the initial state is part of the evidence and should remain reproducible.

Controlled setup. Use the “Run the baseline” stage of the workflow: apply a start-stop, interlock and timed-output rung evaluated left to right from a clean start and record the expected evidence. The acceptance record should show this result: repeated runs produce the same bounded result. Record initial conditions, the exact stimulus and the observation point so another learner can repeat the case without relying on your memory.

Fault challenge. Introduce or analyse “Normal case passes but an edge case fails” as one bounded deviation. Inspect limits, timing, simultaneous events, reset and restart assumptions The working interpretation is that the implementation contains a hidden assumption exposed by the changed condition. The next proving action is to add the failed boundary as a permanent regression case. Change only one condition before observing the result, and preserve timestamps or measurements where timing matters.

Review and recovery. The most common trap here is changing several parameters before a baseline exists. After restoring the cause, repeat the normal case and at least one stop, timeout, disconnect or restart boundary relevant to this topic. Remove temporary forces and bypasses, return the model to a known state and retain the evidence that both operation and recovery are deliberate.

Explain it aloud: What counts as proof of competence? A defensible short answer is: A repeatable artifact or system result plus an explanation of the signal path is stronger than time spent, screenshots or a copied answer. Physical competence requires separate supervised evidence.

Case 04

predict → observe → prove

Prove exercise a boundary case

Engineering context. normally closed interpretation, parallel branches, scan order, retentive state and simultaneous input changes. Choose minimum, maximum, simultaneous, delayed or restart conditions that reveal assumptions hidden by the happy path. Begin with a written normal condition and identify which request, state, physical result or communication value will provide independent confirmation. Do not begin by changing the configuration; the initial state is part of the evidence and should remain reproducible.

Controlled setup. Use the “Challenge assumptions” stage of the workflow: test normally closed interpretation, parallel branches, scan order, retentive state and simultaneous input changes without changing the acceptance contract. The acceptance record should show this result: limits, timing and restart behavior reach defined states. Record initial conditions, the exact stimulus and the observation point so another learner can repeat the case without relying on your memory.

Fault challenge. Introduce or analyse “The failure disappears after reset” as one bounded deviation. Inspect original symptom, histories, diagnostics, timestamps and active cause The working interpretation is that reset changed evidence or state without proving the initiating cause. The next proving action is to reproduce under a controlled condition and preserve pre/post-event data. Change only one condition before observing the result, and preserve timestamps or measurements where timing matters.

Review and recovery. The most common trap here is testing only one ideal sequence. After restoring the cause, repeat the normal case and at least one stop, timeout, disconnect or restart boundary relevant to this topic. Remove temporary forces and bypasses, return the model to a known state and retain the evidence that both operation and recovery are deliberate.

Explain it aloud: Why test faults and restart behavior? A defensible short answer is: Because an inverted condition, duplicate coil, stale tag or missing feedback exposed by the symbol trace or normally closed interpretation, parallel branches, scan order, retentive state and simultaneous input changes can expose assumptions that never appear during ideal startup and steady operation.

Case 05

predict → observe → prove

Prove diagnose a controlled fault

Engineering context. an inverted condition, duplicate coil, stale tag or missing feedback exposed by the symbol trace. Preserve the first symptom, divide the system at a measurable boundary and change one condition only after predicting the result. Begin with a written normal condition and identify which request, state, physical result or communication value will provide independent confirmation. Do not begin by changing the configuration; the initial state is part of the evidence and should remain reproducible.

Controlled setup. Use the “Isolate one failure” stage of the workflow: introduce or analyse an inverted condition, duplicate coil, stale tag or missing feedback exposed by the symbol trace and locate the first disagreement. The acceptance record should show this result: the proving action distinguishes the leading hypotheses. Record initial conditions, the exact stimulus and the observation point so another learner can repeat the case without relying on your memory.

Fault challenge. Introduce or analyse “Simulator and target disagree” as one bounded deviation. Inspect model boundary, software version, task timing, I/O behavior, data types and configuration The working interpretation is that a learning model and the intended target do not share one of the recorded assumptions. The next proving action is to reduce the case and verify against current target documentation. Change only one condition before observing the result, and preserve timestamps or measurements where timing matters.

Review and recovery. The most common trap here is resetting, forcing or replacing before evidence is retained. After restoring the cause, repeat the normal case and at least one stop, timeout, disconnect or restart boundary relevant to this topic. Remove temporary forces and bypasses, return the model to a known state and retain the evidence that both operation and recovery are deliberate.

Explain it aloud: Can browser practice replace official software or hardware? A defensible short answer is: No. It can build concepts and diagnostic reasoning. Exact firmware, I/O electrical behavior, networking, safety and commissioning require current official tools, documentation and target equipment.

Case 06

predict → observe → prove

Prove transfer and hand over

Engineering context. the interpreted rung checked in the selected vendor environment and against the controlled equipment. Restore normal state, remove temporary changes, repeat affected checks and document which claims remain limited to the learning environment. Begin with a written normal condition and identify which request, state, physical result or communication value will provide independent confirmation. Do not begin by changing the configuration; the initial state is part of the evidence and should remain reproducible.

Controlled setup. Use the “Close the evidence loop” stage of the workflow: complete the interpreted rung checked in the selected vendor environment and against the controlled equipment and repeat the affected regression cases. The acceptance record should show this result: reference use is complete when inputs, assumptions, units or initial conditions are recorded and the result is independently checked at a useful boundary. Record initial conditions, the exact stimulus and the observation point so another learner can repeat the case without relying on your memory.

Fault challenge. Introduce or analyse “The result cannot be explained” as one bounded deviation. Inspect prediction, observation, proving action, alternative hypotheses and limitations The working interpretation is that activity occurred but the evidence is not yet transferable or reviewable. The next proving action is to have the learner defend the signal path and repeat a changed case. Change only one condition before observing the result, and preserve timestamps or measurements where timing matters.

Review and recovery. The most common trap here is treating an acknowledged message or one successful rerun as handover. After restoring the cause, repeat the normal case and at least one stop, timeout, disconnect or restart boundary relevant to this topic. Remove temporary forces and bypasses, return the model to a known state and retain the evidence that both operation and recovery are deliberate.

Explain it aloud: How should progress be documented? A defensible short answer is: Keep the requirement, initial state, program or configuration, observed values, fault hypothesis, proving action, recovery result and a concise limitations statement.

Answer surface / 07

Questions people ask about Ladder logic symbols and meanings

These concise answers define the operating, training and product boundaries most often missed in broad summaries. The full workflow and diagnostic table above provide the evidence behind them.

What should I learn first about ladder diagram symbols?

Start with the operating contract and evidence path: contacts, coils, branches, timers, counters, compare and arithmetic symbols grouped by purpose, followed by each symbol to tag state, rung continuity, output ownership and physical feedback. Add advanced features only after the baseline is predictable.

How do I practise ladder diagram symbols effectively?

Use short cases with known initial conditions, a written prediction, one action and an observable result. Then alter a boundary or fault and explain why the evidence changed.

What counts as proof of competence?

A repeatable artifact or system result plus an explanation of the signal path is stronger than time spent, screenshots or a copied answer. Physical competence requires separate supervised evidence.

Why test faults and restart behavior?

Because an inverted condition, duplicate coil, stale tag or missing feedback exposed by the symbol trace or normally closed interpretation, parallel branches, scan order, retentive state and simultaneous input changes can expose assumptions that never appear during ideal startup and steady operation.

Can browser practice replace official software or hardware?

No. It can build concepts and diagnostic reasoning. Exact firmware, I/O electrical behavior, networking, safety and commissioning require current official tools, documentation and target equipment.

How should progress be documented?

Keep the requirement, initial state, program or configuration, observed values, fault hypothesis, proving action, recovery result and a concise limitations statement.

What should I do when the answer differs from a guide?

Check assumptions, version, units and initial state first. Reduce the case, compare one boundary at a time and prefer current primary documentation for target-specific behavior.

When is a ladder diagram symbols exercise finished?

Reference use is complete when inputs, assumptions, units or initial conditions are recorded and the result is independently checked at a useful boundary.