RSLogix 5000 is the product name Rockwell retired around 2012 in favor of Studio 5000 Logix Designer. If you're hunting job postings in 2026 that still say "RSLogix 5000," they almost always mean Studio 5000 — the tools are identical for a newcomer's purposes.
This post walks you from empty project to a running start-stop program in about two hours. Zero prior Rockwell experience assumed. If you've written ladder in another dialect (IEC, Siemens), the mapping is in our dialects comparison post — and our Allen-Bradley training post has the 10-week bigger picture.
What you need before you start
- Studio 5000 Logix Designer — Rockwell's free "Mini" edition is limited but enough for this tutorial. An evaluation license is available if you need ControlLogix features. Alternatively, use our Allen-Bradley dialect in the browser simulator — it executes XIC/XIO/OTE the same way.
- A Windows machine (or a Windows VM on macOS / Linux).
- Two hours.
The five steps
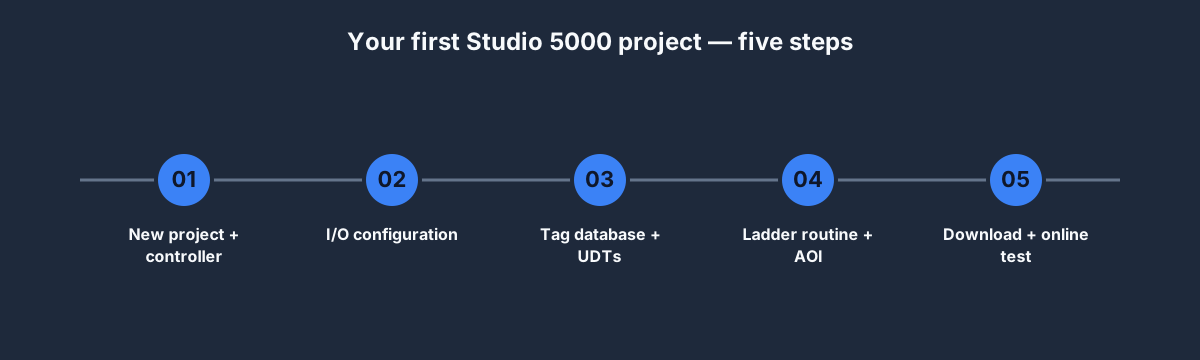
Step 1: New project + controller
Open Studio 5000. File → New. Pick your controller type (for this tutorial, a CompactLogix L30ER is fine — it's one of the cheapest hardware lines and the patterns scale up unchanged).
Name the project MotorStartStop_Tutorial. Accept the defaults. You'll land on the Controller Organizer on the left, and the rung canvas on the right.
Spend 10 minutes just clicking around. Look at:
- Controller Tags — global variable scope
- MainProgram — the default program
- MainRoutine — the default ladder routine
- I/O Configuration — what's not there yet
Step 2: Add I/O
Right-click the controller in I/O Configuration → New Module → pick a 1734-IB4 (four-channel digital input) and a 1734-OB4 (four-channel digital output). Name them InputModule and OutputModule.
Studio 5000 now creates tags for you: Local:1:I.Data.0 through .3 are your inputs; Local:2:O.Data.0 through .3 are your outputs.
Step 3: Tag database + UDTs
Go to Controller Tags. Create four tags at controller scope:
Start_PB— BOOLStop_PB— BOOLMotor_Run— BOOLMotor— a UDT (we'll define it in a moment)
Right-click User-Defined in the Data Types folder → Create New Data Type. Call it MotorInstance. Add members:
| Name | Type |
|---|---|
| Running | BOOL |
| StartCmd | BOOL |
| StopCmd | BOOL |
| FaultCode | DINT |
Save. Now Motor of type MotorInstance gives you structured access: Motor.Running, Motor.StartCmd, etc. Beginners usually don't bother with UDTs in their first project and regret it three weeks later. Use them from day one.
Step 4: Ladder routine + AOI
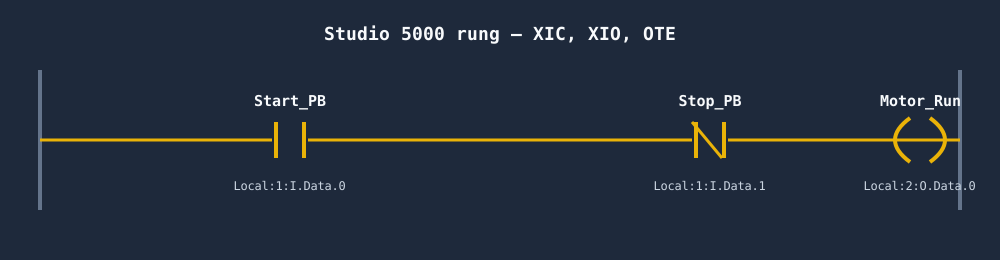
Open MainRoutine. Add a rung. Drop an XIC contact on it. Studio 5000 asks for a tag — type Start_PB. Drop an XIO contact next to it — tag Stop_PB. End with an OTE coil — tag Motor_Run.
You have the bare start-stop rung. To add the seal-in: branch below the XIC, add another XIC reading Motor_Run, merge back to the main line. Now the rung reads: (Start_PB OR Motor_Run) AND NOT Stop_PB → Motor_Run. Classic seal-in.
AOI (Add-On Instruction) — wrap this rung into a reusable block:
- File → New AOI. Name it
MotorStartStop. - Add parameters:
StartPB(Input, BOOL),StopPB(Input, BOOL),Run(InOut, BOOL). - Open the AOI's Logic tab. Paste the same rung you just wrote, but use the parameter names.
- Save. The AOI now appears in the instruction palette.
Back in MainRoutine, delete the raw rung and replace it with a single AOI call: drop a MotorStartStop block, wire its parameters to Start_PB, Stop_PB, Motor_Run.
This is how real ControlLogix projects are structured — AOIs everywhere, raw ladder almost never. Do it from the start.
Step 5: Download and go online
Connect the controller (or start the Studio 5000 Emulate chassis if you're hardware-less). Communications → Download. Watch the status bar — Rockwell talks to itself for a few seconds, then the key switch goes Green. You're in Run mode.
Go Online. The ladder now shows green for TRUE rungs, white for FALSE. Toggle Start_PB from the tag browser: Motor_Run goes TRUE, the rung animates. Toggle Stop_PB: rung goes FALSE.
You just wrote, downloaded, and tested a working Rockwell program.
What to do next
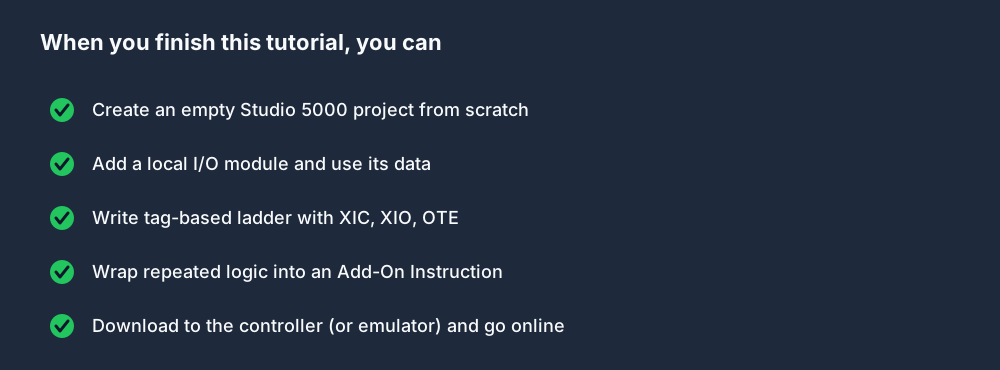
After this tutorial, you can do five things you couldn't this morning. Build on them:
- Make it safer. Add a fault-latch rung and an operator reset. Pattern from our basic PLC programming post, Rung 20.
- Make it timed. Replace the instant start with a 2-second warm-up delay using a
TON. Timers deep-dive for the patterns. - Make it counted. Add a
CTUthat counts start cycles and faults after 10,000 starts for maintenance. Basic PLC programming post, Rungs 9–10. - Port it. Open our browser simulator with the AB dialect toggle, write the equivalent program. Notice what's identical (the logic) and what isn't (the IDE chrome).
Common pitfalls
Five things that bite Rockwell newcomers:
- Tag naming without underscores.
MotorRuncompiles;Motor Run(with a space) throws a cryptic error. Underscore-or-CamelCase always. - XIC vs XIO confusion.
XICreads a bit and is TRUE when it's TRUE.XIOreads a bit and is TRUE when it's FALSE. TheOinXIOdoes NOT stand for "open" in the ordinary sense — it's Rockwell's short for "examine if off." Just memorize it. - OTE in two rungs. Studio 5000 tolerates the same tag on multiple OTE coils, but the last rung wins. That's almost never what you want. Use OTL/OTU (latch/unlatch) pairs if you genuinely need two sources.
- Forgetting to download after editing. The online view shows the downloaded program, not your edits. Edit, accept, download — always in that order.
- Mixing Local: tag names with alias names. When you finally add an HMI, alias
Motor_Runso you can renameLocal:2:O.Data.0without breaking every screen. Aliases exist; use them.
FAQ
Is RSLogix 5000 free?
No. Studio 5000 (its current name) has a Mini edition that's free for limited use (MicroLogix-class controllers only). ControlLogix-capable licenses cost USD 2,500+ per seat. Evaluation licenses are cheap and fine for learning.
Can I learn Studio 5000 without hardware?
Yes. Studio 5000 Emulate simulates a controller on your PC. For browser-based practice without any Rockwell install, our AB dialect simulator covers the same semantics.
How long does it take to learn RSLogix 5000?
One afternoon for the first program (this tutorial). Two to three months to be productive on real projects. One to two years to be genuinely fluent across ControlLogix, GuardLogix, and FactoryTalk View. See our Allen-Bradley training 10-week plan.
What's the difference between RSLogix 5, RSLogix 500, and RSLogix 5000?
- RSLogix 5 → PLC-5 (legacy, rare in 2026)
- RSLogix 500 → SLC 500 / MicroLogix (still widely installed)
- RSLogix 5000 → ControlLogix / CompactLogix / GuardLogix (the modern stack, renamed to Studio 5000)
Learn Studio 5000 first. The older tools only matter if you're specifically maintaining legacy systems.
Where to start
- Sign up free and toggle the Allen-Bradley dialect on the simulator.
- Write the start-stop rung in XIC/XIO/OTE. That's the motion this tutorial teaches you, minus the Rockwell IDE chrome.
- When you're ready for the IDE, install the Studio 5000 Mini edition and follow this tutorial again.
- Move on to the full Allen-Bradley training plan when you've finished.